Blog

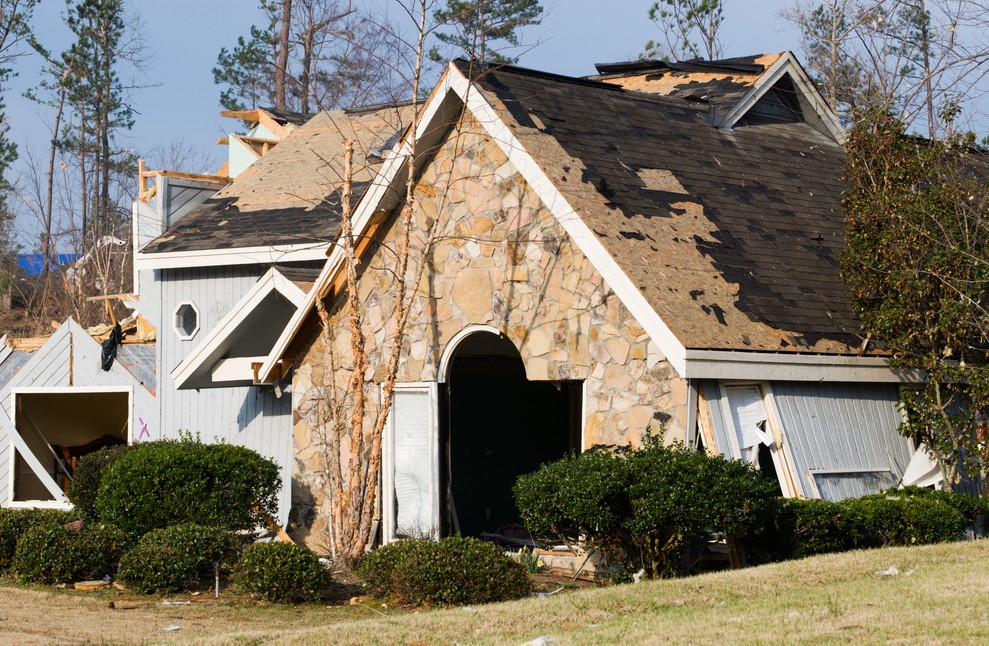
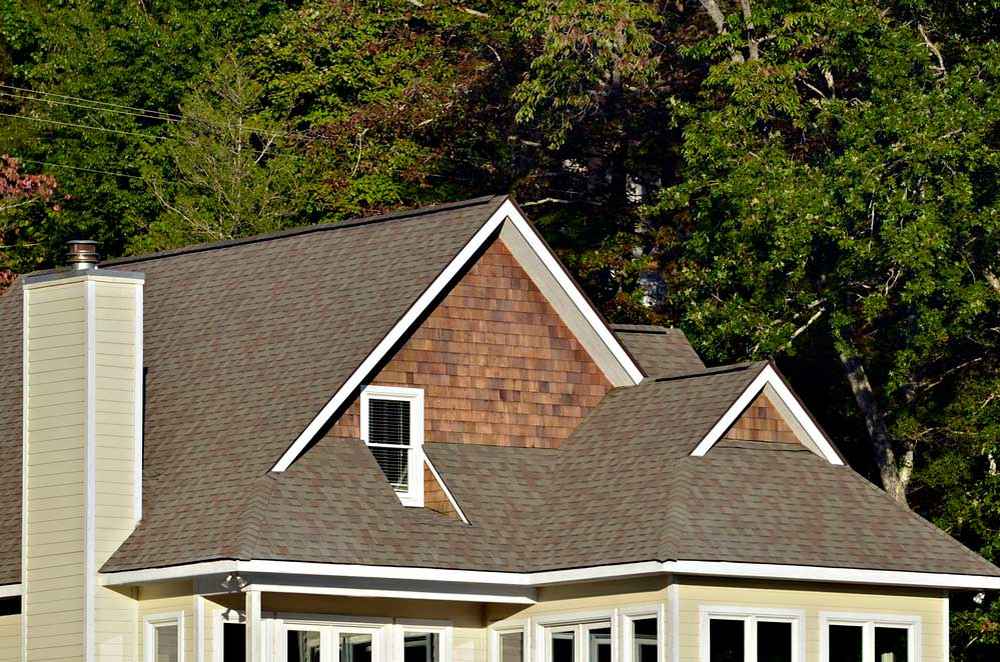
After a Colorado thunderstorm rips through your neighborhood, you might notice a few shingles in the yard, or worse, a leak forming in your attic. If your roof takes a hit, knowing how to navigate Colorado roof insurance claims is essential for protecting your home and finances.

Roof repairs after hail, wind, or snow damage can add up quickly. The insurance claim process exists to help, but it can be confusing and frustrating to handle alone. That’s where this guide comes in.

Not sure where that leak is coming from? Mile High Roofing Services can help with a free inspection and expert claim support.

What Is a Roof Insurance Claim (and Why It Matters)?

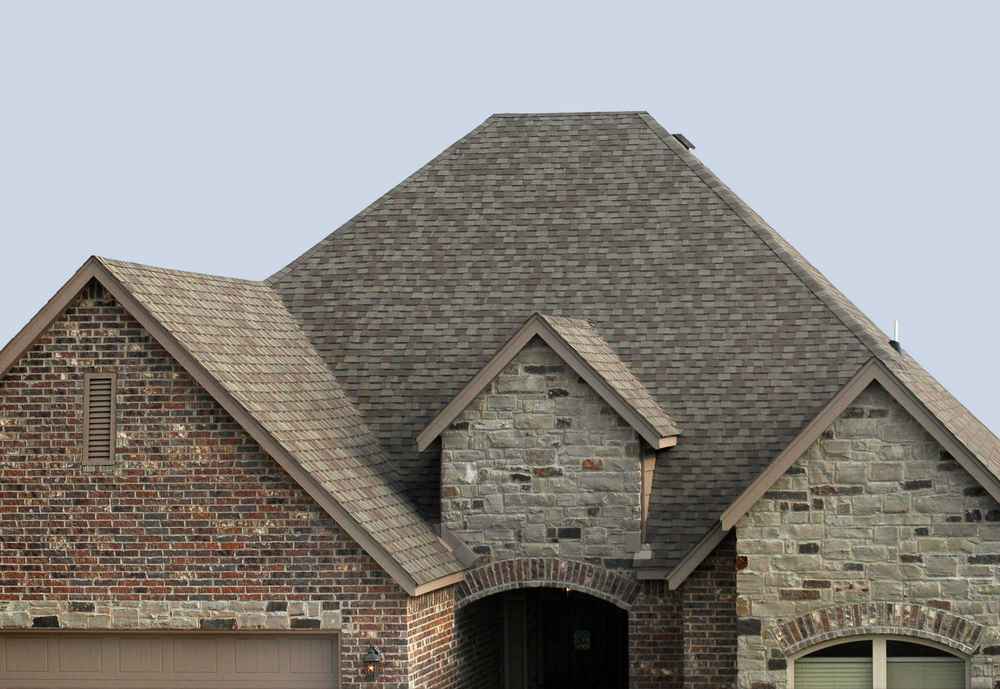
In plain terms, a roof insurance claim is a request you file with your homeowners insurance company to cover the cost of repairs after your roof is damaged. In Colorado, hailstorms, high winds, and heavy snow are common causes of roof damage, which is why storm damage roofing claims are so frequent here.

But filing a claim doesn’t guarantee approval. Insurance companies often challenge whether damage was caused by the storm, or argue that wear and tear or improper installation is to blame.

Colorado ranks second in the U.S. for hail-related insurance claims. That means local insurers are cautious, and homeowners need to be informed and proactive to get the full payout they deserve.

If you don’t act fast after a storm, you risk missing your window to file. Most policies require claims to be filed within one year, and some counties have strict rules about documentation. That’s why working with a reputable, licensed roofer in Colorado, like Mile High Roofing Services, can make all the difference.

Before You File a Claim: What You’ll Need

Getting your paperwork in order ahead of time saves stress and increases your chances of a successful outcome.

Here’s what you should prepare:

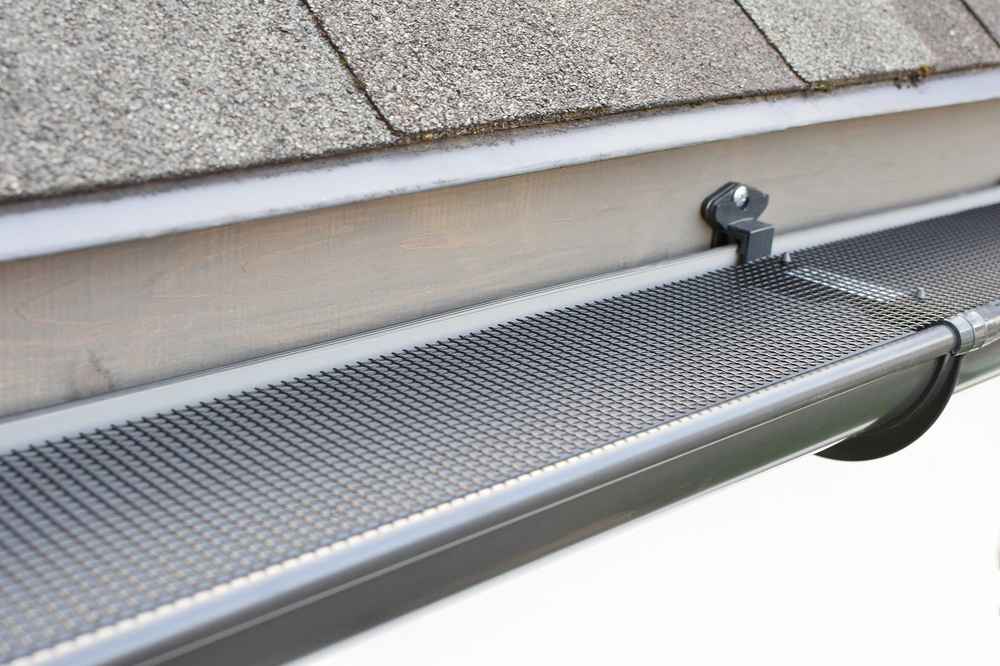
  • Photos and video: Take multiple angles of any visible damage (shingles, gutters, interior leaks).
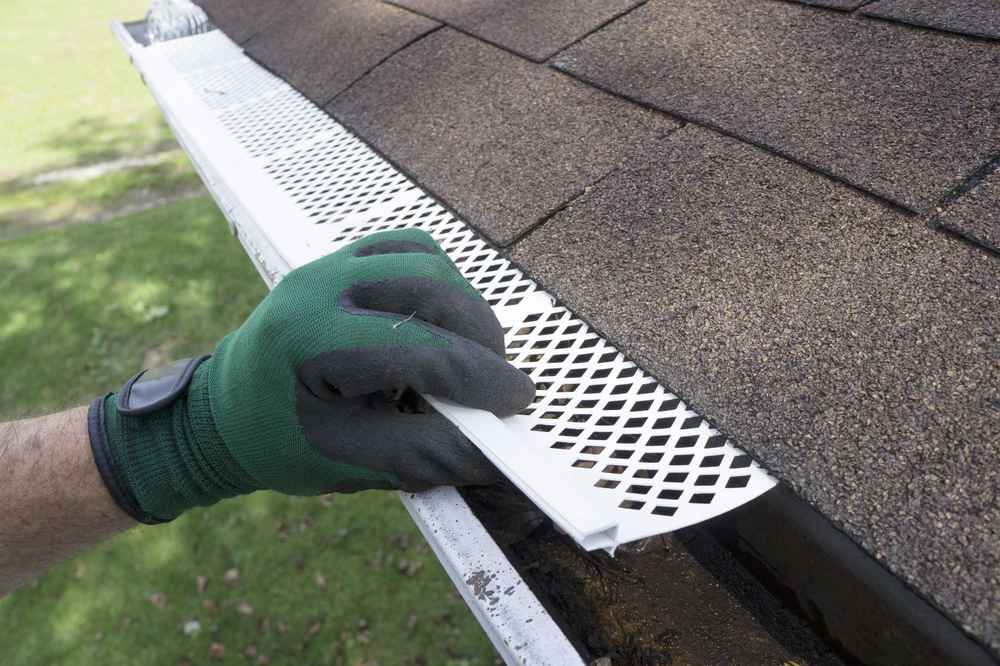
  • Roof inspection: Schedule a pro inspection with a licensed contractor to uncover hidden damage.
  • Policy details: Know your deductible, your coverage type (ACV vs. RCV), and any exclusions.
  • Repair history: If your roof was previously repaired or replaced, keep records on file.
  • Mortgage info: Insurance checks may be co-issued with your mortgage company.

Filing a claim without this information could lead to delays or a lower settlement than you deserve.

Step-by-Step: Navigating Colorado Roof Insurance Claims

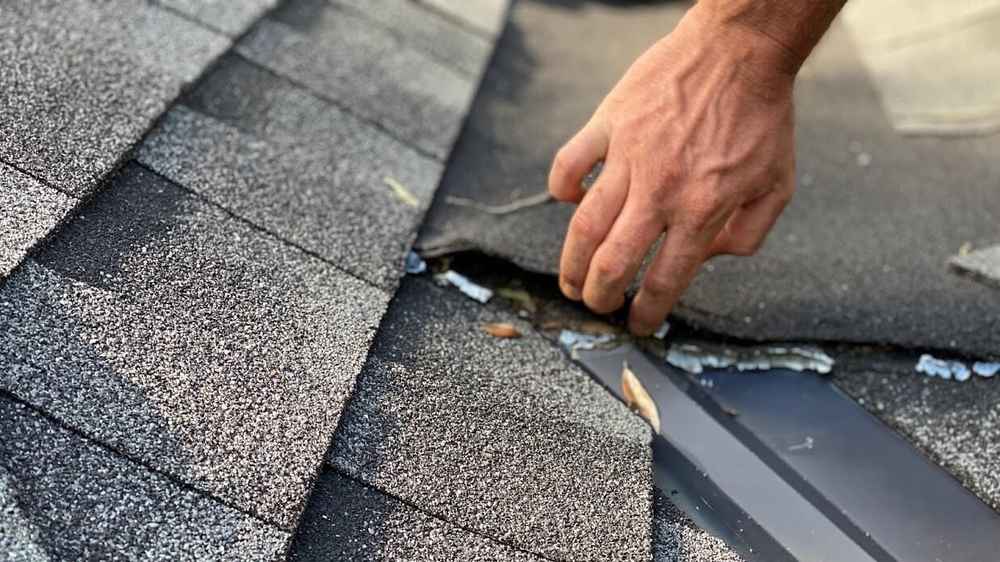
1. Inspect and Document the Damage

After the storm clears, safely walk around your home and photograph any visible damage. This includes missing shingles, dented vents, fallen limbs, and interior leaks.

Colorado roof insurance claims

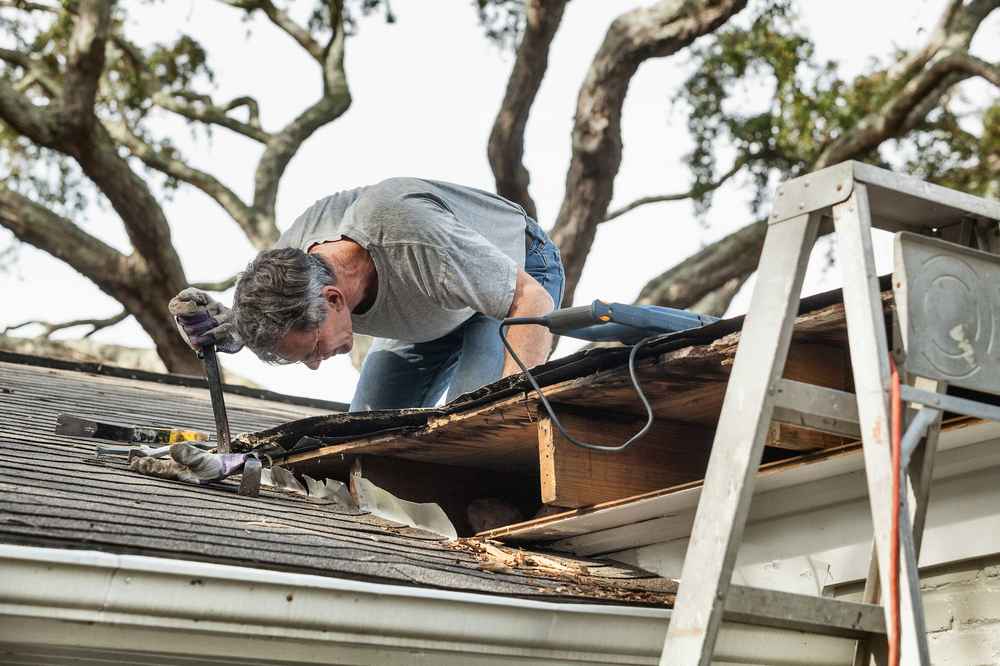
2. Get a Professional Roof Inspection

Contact a trusted roofing contractor for a full inspection. At Mile High Roofing Services, we provide thorough assessments, including photos, damage reports, and repair estimates.

3. Review Your Insurance Policy

Understand what’s covered and how your claim will be processed. Policies typically pay either Replacement Cost Value (RCV) or Actual Cash Value (ACV).

  • RCV: Covers full replacement cost, minus your deductible.
  • ACV: Pays current market value after depreciation.

4. File the Claim

Call your insurance company or file online. Be prepared to submit your documentation and provide a date of loss (the date of the storm).

5. Meet with the Insurance Adjuster

Your insurer will send their adjuster to assess the damage. Having your roofing contractor present helps ensure nothing is overlooked.

6. Compare Estimates

Your contractor’s estimate may differ from the adjuster’s report. A good contractor can help you negotiate fair reimbursement.

7. Approve Work and Begin Repairs

Once the claim is approved, you’ll receive the first payment (usually ACV). After the work is completed, the remaining funds are released.

The Risks of Going It Alone (and the Value of a Trusted Roofer)

Trying to navigate Colorado roof insurance claims without expert support can leave homeowners vulnerable to underpayments, missed damage, or even claim denials.

Insurance companies may reject a claim if:

  • The damage is considered cosmetic only
  • The roof is over 20 years old
  • The damage is deemed pre-existing or due to poor maintenance

With Mile High Roofing Services on your side, you get:

  • A full damage report to support your claim
  • In-person adjuster support to advocate for a fair payout
  • Honest advice on whether a claim is even necessary
  • Licensed repair work that meets code and warranty standards

In storm-prone cities like Denver, Castle Rock, and Colorado Springs, our team has helped hundreds of homeowners successfully navigate storm damage roofing repairs from start to finish.

Quick Reference: Insurance Claim Essentials

  • Document everything: Photos, videos, receipts, prior maintenance records
  • Understand your policy: Know your deductible and RCV vs. ACV terms
  • Don’t delay: Most insurers have 6–12 month deadlines
  • Hire a pro: Choose a licensed roofer to inspect and support your claim
  • Attend the adjuster’s visit, And bring your contractor with you

Colorado Roofing Insurance Claim FAQs

What’s The First Step After Storm Damage?

Start by taking photos of visible damage, then schedule a roof inspection before contacting your insurer.

How Do I Know If My Policy Covers Storm Damage?

Most homeowner policies in Colorado cover storm damage roofing, but the payout depends on your roof’s age and your policy type. Check for exclusions and depreciation.

What If The Insurance Company Denies My Claim?

You can appeal the decision with additional documentation or seek help from a public adjuster or attorney. Mile High Roofing Services can help you evaluate your next steps.

Can I Start Repairs Before The Claim Is Approved?

Only perform temporary repairs to prevent further damage (like tarping). Don’t begin full repairs until the claim is approved, or you risk coverage issues.

Should I Meet With The Insurance Adjuster?

Yes. Being present ensures your concerns are heard, and having your contractor there adds credibility and technical insight.

Secure Your Roof, and Your Claim, with Mile High Roofing Services

Storms in Colorado can strike fast, but recovery doesn’t have to be overwhelming. With the right plan and the right people on your side, filing a roofing insurance claim can be smooth and stress-free.

At Mile High Roofing Services, we’ve earned the trust of homeowners by combining skilled workmanship with expert claim support. We’ll help you assess the damage, understand your policy, and work directly with your insurer, so you get the full coverage you’re entitled to.

Schedule your free estimate today and take the first step toward a stronger, storm-ready roof. We’re here to help, before, during, and after the claim.

On a cold February morning in Colorado Springs or a sweltering July afternoon in Fort Collins, your home’s siding does more than protect; it insulates. Choosing the right Colorado energy-efficient siding can help keep your home warm in the winter, cool in the summer, and save money all year long.

Whether you’re building new or planning an upgrade, insulation and efficiency should be at the top of your checklist. Some siding options stand up to the elements, and your energy bill, better than others.

Not sure which siding is right for your home? Schedule a free estimate with our expert team, we’re happy to help.

Key Takeaway:

  • Siding impacts both insulation and energy bills; the right material helps regulate indoor temperatures and reduces HVAC strain.
  • Fiber cement and Hardie Board siding offer excellent insulation, fire resistance, and durability, making them top choices for Colorado’s climate.
  • LP SmartSide siding performs well in hail-prone areas with low moisture absorption and strong impact resistance.
  • Composite siding provides stable, low-maintenance performance with UV and moisture resistance, ideal for variable weather zones.
  • Stucco siding forms a continuous thermal barrier and works especially well in dry regions when paired with foam insulation.
  • Insulated vinyl siding is a budget-friendly option that improves energy performance with foam-backed panels.
  • Wood siding is naturally insulating and eco-friendly, but requires higher maintenance in Colorado’s freeze-thaw conditions.
  • Choosing siding with high energy efficiency can extend material lifespan, reduce repair costs, and increase comfort year-round.

What Makes Siding Energy-Efficient in Colorado?

Energy-efficient siding does more than look good. It acts as a barrier between your home and the outside world, keeping heat in during the winter and out during the summer. In a state like Colorado, where daily temperature swings can be extreme and UV exposure is high, selecting the best siding for insulation is especially important.

To put it simply: the better your siding is at reducing thermal transfer, the less your HVAC system has to work. Over time, this can mean real savings on utility bills. It also reduces the risk of condensation, mold growth, and drafts, all of which can affect your indoor comfort and air quality.

Local building codes and wildfire risk also factor into the decision. Non-combustible materials like fiber cement are preferred in many mountain regions, while moisture-resistant siding is key for areas with snowmelt or spring storms. And if you’re looking to maximize efficiency, pairing your siding with quality insulation and professional installation is a must.

What to Know Before You Choose Energy-Efficient Siding

Before diving into materials, keep a few preparation steps in mind:

  • Budget: Expect to pay more for high-performance materials up front, but benefit from long-term energy savings and fewer repairs.
  • Installation conditions: Some sidings, like stucco or fiber cement, require dry weather and skilled crews for best results.
  • Home style: Siding aesthetics should match your home’s design and neighborhood standards.
  • Building codes: Check for regional fire-resistance or insulation requirements.
  • Professional help: Always work with licensed installers to ensure you’re meeting local codes and warranty standards.

Your contractor may also recommend adding a weather-resistant barrier or rigid foam board behind the siding to further improve thermal efficiency.

Colorado energy-efficient siding

The Most Energy-Efficient Siding Options for Colorado Homes

Let’s break down the best materials to improve insulation and comfort for Colorado homeowners.

Hardie Board Siding

Hardie board is a type of fiber cement siding composed of sand, cellulose fibers, and cement. It’s tough, moisture-resistant, and ideal for homes in wildfire-prone or high-moisture areas.

Why it’s great for energy efficiency:

  • Non-combustible and fire-resistant
  • Resists swelling, cracking, and warping
  • Can be paired with rigid insulation for superior thermal performance

Fiber Cement Siding

Fiber cement is one of the most popular Colorado energy-efficient siding choices. It’s dense and durable, giving it excellent resistance to wind, pests, and fire.

Best for insulation because:

  • Offers high thermal mass, helping regulate indoor temperatures
  • Won’t absorb moisture, preserving R-values of underlayment
  • Paintable and long-lasting

LP SmartSide

Engineered wood siding like LP SmartSide offers the appearance of wood with added strength and water resistance. It holds up remarkably well in variable weather and comes pre-treated to resist rot, decay, and termites.

Insulation advantages include:

  • Excellent impact resistance against hail and debris
  • Low moisture absorption preserves insulation efficiency
  • Durable surface resists cracking in freeze-thaw cycles

Composite Siding

Composite siding blends wood fibers with resins and protective coatings. It’s designed to mimic the look of natural wood while reducing maintenance and improving longevity.

Why composite makes sense in Colorado:

  • UV and moisture resistant
  • Stable structure limits expansion and contraction
  • Can be painted in any color to reflect heat or boost R-value

Stucco Siding

Stucco is a cement-based coating applied directly to the exterior, creating a continuous, insulated shell. It’s especially popular in drier climates, but modern versions are adapted to Colorado’s conditions.

Energy-efficient benefits:

  • Naturally insulating, reducing heat transfer
  • Great at sealing out drafts and pests
  • Works well with added foam board backing

Vinyl Siding

Vinyl siding remains a top option for affordability and customization. While not inherently insulating, many vinyl products now include foam-backed options to enhance energy performance.

Vinyl’s energy perks:

  • Foam-insulated panels improve R-value
  • Reflects sunlight, helping reduce cooling costs
  • Budget-friendly for energy-conscious upgrades

Wood Siding

Wood may not be the first option that comes to mind for insulation, but when properly installed and maintained, it performs well and is highly sustainable.

Why wood can still be a smart choice:

  • Naturally insulating due to its density
  • Can be combined with rigid foam board or house wrap
  • Renewable and biodegradable, great for eco-conscious homeowners

Siding Material Comparison: Efficiency at a Glance

Siding Type Energy Efficiency Fire Resistance Maintenance Ideal Climate Conditions
Hardie Board High Excellent Low Fire-prone, variable weather
Fiber Cement High Excellent Low Hail, snow, wildfire areas
LP SmartSide Moderate-High Good Low-Mid Hail-prone, variable temps
Composite Moderate Good Low UV exposure, storm-prone
Stucco High Excellent Mid Dry climates, Southwest CO
Vinyl (Insulated) Moderate Low Low Budget builds, dry zones
Wood Moderate Low High Dry climates, eco-focused homes

Fort Collins Siding FAQs

What’s The Best Siding For Insulation In Colorado Homes?

Fiber cement and LP SmartSide are often considered the best siding for insulation due to their thickness, moisture resistance, and durability in high-UV and cold-weather conditions.

Can Insulated Vinyl Siding Help Lower Energy Bills?

Yes. Insulated vinyl siding includes foam backing that adds thermal resistance and can reduce heat transfer, lowering both heating and cooling costs.

Is Stucco A Good Energy-Efficient Siding In Colorado?

Typically yes, especially in dry or southern regions of the state. Stucco creates a solid envelope and performs well when installed over foam board insulation.

How Long Does Energy-Efficient Siding Last?

Most Colorado energy-efficient siding materials like fiber cement, LP SmartSide, and composite options last 25–50 years with proper care.

Build Efficiency from the Outside In

Colorado’s beautiful but extreme weather means your home needs more than just an aesthetic appeal, it needs real protection and real insulation. Whether you’re bracing for hail, prepping for fire season, or just tired of drafty walls, choosing the right Colorado energy-efficient siding can make all the difference.

At Mile High Roofing Services, we help Colorado homeowners find siding that saves energy, looks great, and stands up to everything the climate throws at it. From modern fiber cement to classic wood and high-tech LP SmartSide, we’ll guide you through the options and install it right.

Ready to boost your home’s energy performance? Schedule your free estimate today, and let’s find the best siding for insulation in your Colorado home.

As the aspens turn golden and the nights in Colorado grow cooler, it’s clear that winter is on its way. For homeowners across the Front Range and beyond, that means it’s time to get serious about Colorado roof maintenance, before snow, ice, and freezing temperatures set in.


Every fall, we see the same story: a few missing shingles or clogged gutters turn into full-blown leaks or ice dams by January. If you’re unsure where to start with fall roof preparation, don’t worry, we’ve got you covered.


Every Colorado homeowner should prepare for winter by replacing any damaged shingles or flashing, cleaning gutters and checking downspouts, improving attic ventilation and insulation, trimming overhanging trees, and scheduling a professional roof inspection to catch potential issues before snow and ice arrive.


Not sure where that leak is coming from? Mile High Roofing Services can help.

roof inspection in Colorado

Key Takeaways: Colorado Roof Maintenance for Fall

  • Inspect your roof for all types of damage, including missing shingles, loose flashing, and signs of wear.
  • Clean your gutters and downspouts so you can prevent ice dams and water backup during snowstorms.
  • Check attic insulation and ventilation to reduce energy bills and prevent winter moisture issues.
  • Trim those overhanging branches to avoid roof damage from falling limbs or leaf buildup.
  • Seal or replace flashing around chimneys, vents, and skylights to stop leaks at common weak points.
  • Schedule a professional roof inspection by early October to catch problems before winter hits.
  • Document all maintenance and repair work for warranty and insurance purposes.
  • Investing in fall roof preparation improves energy efficiency, protects warranties, and enhances home value.

Why Fall Roof Preparation in Colorado Matters

Think of your roof like a winter jacket for your house, it’s your first line of defense against the elements. But if it has holes, weak seams, or poor insulation, it won’t keep the cold (or water) out. That’s why Colorado roof maintenance isn’t just about checking a box, it’s about protecting your investment.


In Colorado, our climate delivers extreme seasonal swings. Snowfall totals can exceed 50 inches annually in cities like Fort Collins or Evergreen, while areas like Pueblo may see less snow but more temperature swings and UV exposure. These conditions take a toll on every type of roofing material.


Plus, our elevation amplifies UV damage, making shingles brittle and flashing prone to cracking. Combine that with ice dams caused by poor ventilation, and you’ve got a recipe for mid-winter water intrusion.


What makes fall the best time for a roof checkup? Roofing materials install well in cool, but not freezing, temperatures, and fall inspections give you time to make any necessary repairs before the first snowfall. If you wait until winter, your options (and roofers’ availability) shrink fast.

What You’ll Need Before You Begin

Before diving into your fall roof preparation, gather the following:

  • A sturdy ladder, gloves, and safety harness (if doing DIY inspection)
  • Flashlight for attic inspection
  • Basic roofing sealant for small fixes
  • Camera or phone to document damage
  • Access to a roofing contractor for professional evaluation


If you’re considering DIY vs professional help, here’s a quick breakdown:

Task DIY-Friendly? Pro Recommended?

Cleaning gutters 🔄 (if 2+ stories)

Inspecting attic insulation

Roof shingle repair 🔄 (minor)

Flashing & vent repair

Full roof inspection


If you’re unsure, always opt for a professional gutter and roof inspection; it could save you thousands later.

What Is The Best Fall Roof Maintenance Checklist for Colorado Homes

1. Inspect Your Roof’s Surface

Walk the perimeter of your home and look for:

  • Missing, curling, or cracked shingles
  • Exposed nail heads or loose flashing
  • Debris or standing water in valleys


Take photos and note anything that looks off. If you’re comfortable doing so safely, inspect from the ladder at gutter height.

2. Clean Out Gutters and Downspouts

Leaves, twigs, and pine needles and other debris can clog your gutters fast. This leads to water pooling and freezing, which causes leaks or ice dams.

  • Remove visible debris
  • Flush gutters with a hose
  • Check for sagging or leaks


If your gutters are constantly clogged, consider installing gutter guards this fall.

3. Check Attic Ventilation and Insulation

Poor ventilation traps warm air in your attic, which melts snow on the roof. That melt refreezes at the edge, creating ice dams.

  • Inspect soffit vents, ridge vents, and attic fans
  • Look for mold or signs of moisture buildup
  • Ensure insulation is dry and evenly distributed

4. Trim Overhanging Branches

Branches that hang too close to your roof can scrape shingles or fall during heavy snow.

  • Trim anything within 6 feet of your roofline
  • Remove dead or diseased branches
  • Rake leaves regularly to keep valleys and gutters clear

5. Inspect Flashing Around Vents and Chimneys

Most leaks begin at flashing seams or penetrations.

  • Look for rust, gaps, or lifting edges
  • Seal minor cracks with roofing cement
  • Schedule professional repair if flashing is loose or corroded

6. Schedule a Professional Roof Inspection

A professional eye can spot signs of damage most homeowners miss.

  • Book an inspection by early October
  • Ask for documentation and a detailed quote if repairs are needed
  • Keep records for warranties or insurance claims

roof inspection in Colorado

How Proper Fall Prep Adds Long-Term Value

Investing in Colorado roof maintenance each fall doesn’t just prevent winter disasters, it adds real, measurable value to your home.

Energy Savings

According to the U.S. Department of Energy, proper attic insulation and ventilation can lower heating costs by up to 15% in cold climates. That’s especially important in places like Boulder or Castle Rock, where sub-zero nights are common.

Warranty Protection

Many roofing warranties make you show proof of regular maintenance. Keeping records of inspections, repairs, and photos helps protect your investment.

Ice Dam Prevention

Ice dams are actually one of the most damaging winter roofing issues in Colorado. They force water under shingles and into your roof deck, often leading to mold, insulation damage, and ceiling leaks. Proactive insulation upgrades and roof rake usage can help mitigate this.

Curb Appeal and Resale Value

A roof in good condition boosts your home’s value and gives peace of mind to potential buyers. If you’re thinking about selling in the next few years, proactive fall maintenance now can help you avoid costly pre-sale roof work later.

Quick Reference: Fall Roof Maintenance Tasks

  • Inspect for missing/damaged shingles
  • Clean gutters and downspouts
  • Trim nearby trees
  • Check attic ventilation and insulation
  • Seal flashing
  • Schedule professional inspection
  • Record all repairs and updates

Colorado Roof Maintenance FAQs

When Should I Schedule A Roof Inspection In Colorado?

The ideal window for fall roof preparation is late August to early October, before the first snowfall hits and temperatures drop.

Can I Skip Fall Maintenance If My Roof Is New?

Even new roofs need an annual check. Wind, hail, or falling branches can cause early wear, especially in Colorado’s variable climate.

How Do I Know If My Gutters Are Winter-Ready?

Check for sagging sections, leaks, or slow drainage. Clean them at least twice in the fall and consider gutter guards for pine-heavy areas.

What’s The Cost Of A Fall Roof Inspection In Colorado?

A standard inspection typically ranges from $200–$500. However, some local companies, like Mile High Roofing Services, offer free inspections during seasonal checkups.

Ready for Fall? Let’s Protect Your Roof

From Estes Park to Colorado Springs, every homeowner needs a solid plan for fall roof preparation. Your roof is your home’s shield against harsh winters, and it only takes one overlooked crack or clogged gutter to compromise that protection.


At Mile High Roofing Services, we’re proud to help Colorado families get their homes winter-ready. With over 12 years of experience, industry certifications, and hundreds of five-star reviews, we’re your go-to team for expert Colorado roof maintenance, from seasonal inspections to emergency repairs.

Schedule your free estimate today and let us help you head into winter with confidence.

When you live in Colorado, your roof has to handle more than just rain. From scorching summer UV to high-altitude hailstorms and heavy winter snow, your shingles work overtime year-round. Choosing the right Colorado asphalt shingles is essential not just for aesthetics, but for long-term protection.


Whether you’re upgrading a roof after storm damage or planning a full replacement, understanding your options helps you make a smart investment. Not sure which is right for your home? Schedule a free estimate with our team today. We’re here to help.

Key Takeaways: Choosing the Right Asphalt Shingles in Colorado

  • Colorado asphalt shingles must withstand UV exposure, hail, snow, and wind, making product selection crucial.
  • Three-tab shingles are the most affordable option, best for short-term use and homes in lower-risk areas.
  • Architectural shingles offer the best balance of price, curb appeal, and performance, with lifespans of 30–50 years.
  • Premium shingles deliver maximum durability and upscale aesthetics, often with Class 4 impact resistance and insurance discounts.
  • Class 4-rated shingles are highly recommended for the best shingles for the Colorado climate, especially in hail-prone regions.
  • Local codes in some cities (e.g., Fort Collins) require impact-resistant shingles, so always check regulations before choosing.
  • Reflective shingle options can reduce summer cooling costs by up to 15% in hot, high-sun areas.
  • Professional installation and a roof inspection help ensure your chosen shingles are code-compliant and properly supported.

asphalt shingle roofing in Colorado

Why Shingle Selection Matters in Colorado

Let’s break this down. Asphalt shingles are the most widely used residential roofing material in the U.S., and for good reason. They’re cost-effective, flexible, and easy to install. However, not all asphalt shingles are created equal, especially in Colorado’s intense climate conditions.


With high elevations ranging all over the place, homes across Colorado experience extreme temperature swings, high UV exposure, heavy snow, and frequent hail. That’s why it’s important to choose the best shingles for Colorado climate, shingles that aren’t just pretty but built for performance.


Your roof isn’t just a cosmetic choice. A weak roof system will lead to higher energy bills, more frequent repairs, and even voided warranties if local codes aren’t met. The good news? You don’t have to navigate this decision alone. Our licensed, insured team can help you weigh your options based on your home’s location, budget, and long-term goals.

What You Need to Know Before Choosing Shingles

Before picking a shingle type, you’ll want to think about a few key factors:

  • Budget: 3-tab shingles are the most budget-friendly, while premium options are a bigger upfront investment.
  • Lifespan: Architectural and premium shingles typically outlast 3-tab shingles by 10–30 years.
  • Curb appeal: Thicker, dimensional shingles offer more texture and color variety.
  • Code requirements: Some Colorado cities (like Fort Collins) require Class 4 impact-resistant shingles for new installations.
  • Insurance discounts: Class 4 shingles often qualify for lower homeowner premiums.


It’s also smart to schedule a roof inspection before making a final decision. A professional evaluation will determine if your decking, ventilation, or structure requires upgrades during installation, which is especially important when upgrading to heavier materials like premium shingles.

Types of Colorado Asphalt Shingles We Install

Three-Tab Asphalt Shingles

3-tab shingles are named for their cutouts, which give the illusion of three separate pieces. They’re flat, lightweight, and simple in design, great for budget-conscious homeowners or rental properties.

Best for:

  • Homes in lower-risk hail zones
  • Short- to medium-term ownership
  • Flat-to-moderate roof pitches

Pros:

  • Affordable and widely available
  • Easy to install and repair
  • Classic, clean look

Cons:

  • Shorter lifespan (up to 20 years)
  • Less resistant to wind and hail
  • Limited design variety

Architectural Asphalt Shingles

Architectural shingles, also called dimensional or laminated shingles, are a step up in both appearance and durability. These shingles are built with multiple layers of asphalt and granules, giving them a thicker profile and better protection.

Best for:

  • Mid- to high-value homes
  • Neighborhoods with aesthetic guidelines
  • Areas prone to hail or wind

Pros:

  • Longer lifespan (30–50 years)
  • Enhanced weather resistance
  • Wide range of colors and textures
  • Some models include solar-reflective granules

Cons:

  • Higher cost than 3-tab shingles
  • Heavier, so they require solid roof decking

Premium Asphalt Shingles

Premium shingles are high-end products designed to mimic the look of slate or cedar shake at a fraction of the cost. These are a favorite among homeowners looking to boost curb appeal without compromising performance.

Best for:

  • Custom homes or luxury remodels
  • High-altitude or hail-prone regions
  • HOA-restricted neighborhoods

Pros:

  • Highest aesthetic value
  • Longest durability (up to 50 years)
  • Class 4 impact resistance available
  • Often eligible for insurance discounts

Cons:

  • Higher material and installation costs
  • May require structural reinforcement

How Do These Shingle Types Compare?

Feature 3-Tab Shingles Architectural Shingles Premium Shingles

Lifespan 15–20 years 30–50 years 40–50 years

Wind Resistance 60–70 MPH 110–130 MPH 130+ MPH

Hail Resistance (Class 4) Optional Available Available

Curb Appeal Simple and flat Dimensional, textured Slate or cedar appearance

Cost Lowest Moderate Highest

Insurance Discounts Rare Sometimes (Class 4) Frequently (Class 4)


Architectural shingles hit the sweet spot for most Colorado homes, balancing cost, durability, and appearance. Premium shingles are ideal when you want top-tier protection and aesthetics, while 3-tab is a fit for simpler roofs or tighter budgets.

The Long-Term Value of the Right Shingle

Choosing the right Colorado asphalt shingles isn’t just about getting through the next storm. It’s about long-term protection, resale value, and energy efficiency.

  • Durability: In areas like Colorado Springs and Greeley, Class 4 shingles can add 10–15 years to your roof’s lifespan thanks to improved hail resistance.
  • Energy Savings: Reflective shingle options can lower cooling bills by up to 15% in hot, sunny areas like Pueblo and Grand Junction.
  • Peace of Mind: With a properly installed system, you won’t have to worry about leaks, ice dams, or wind damage every time the weather shifts.


At Mile High Roofing Services, we specialize in matching homeowners with the best shingles for Colorado climate, and we back it all with trusted brands like Owens Corning, GAF, and CertainTeed.

asphalt shingle roofing in Colorado

Quick Reference: Choosing Your Colorado Asphalt Shingles

  • 3-Tab Shingles – Best for budget-conscious homes or temporary ownership
  • Architectural Shingles – Most popular; balance of performance and price
  • Premium Shingles – Luxury look, best for resale, and top-level protection
  • Look for Class 4 ratings to handle hail and qualify for insurance discounts
  • Always check with your city’s roofing codes before choosing a product

Colorado Asphalt Shingle FAQs

What Are The Best Shingles For Colorado Climate?

Architectural and premium Class 4 asphalt shingles are the best shingles for Colorado climate due to their high wind and hail resistance.

Can I Install Three-Tab Shingles In High-Wind Zones?

Typically not recommended. Most 3-tab shingles have lower wind resistance (60–70 MPH), which may not meet code in some Colorado counties.

How Long Do Architectural Shingles Last In Colorado?

Architectural shingles typically last 25–30 years in Colorado, slightly less than their rated 50-year lifespan due to UV and storm exposure.


Are Premium Shingles Worth The Higher Price?

If you plan to stay in your home long-term or want maximum protection and resale value, premium shingles are an excellent investment.

Ready to Upgrade? Let’s Build a Roof That Lasts

No matter where you live in the state, the right shingles make all the difference in protecting your Colorado home.


At Mile High Roofing Services, we’ll help you compare your options, meet code, and choose the Colorado asphalt shingles that offer the protection and look you need.


We’re certified by Owens Corning and install all leading brands, including GAF, Malarkey, IKO, and CertainTeed. With transparent pricing, industry-best warranties, and 5-star service, we’re ready to make your next roof the best one yet.

Schedule your free estimate today and let us help you find the best shingles for Colorado climate, built to last, and backed by pros who care.

Your gutter system might not be the flashiest part of your home, but it’s one of the most important. Gutters are made to direct rainwater away from your roof, siding, and foundation, keeping your property dry, safe, and structurally sound. But like any exterior system, gutters don’t last forever. At a certain point, repairs just won’t cut it, and full replacement becomes the smartest and safest move.

So, when is it time to replace gutters, and what are the warning signs to watch for? In this blog, we’ll cover the top indicators your gutters are failing, explain the risks of ignoring the problem, and help you decide on the best time to replace your gutters, especially if you live in Westminster, CO, where weather extremes can take a toll on your home’s exterior.

Why Gutter Replacement Matters

Your gutters are part of your home’s first line of defense against water damage. When they’re working properly, they protect your:

  • Foundation from erosion and settling
  • Roof and fascia from rot and deterioration
  • Basement from flooding and moisture damage
  • Siding and paint from staining and decay
  • Landscaping from runoff damage

But when gutters begin to fail, all of that protection is compromised. Small leaks or sagging sections may seem minor at first, but they can quickly turn into serious and expensive problems. Knowing the signs for a gutter replacement early can save you from much larger headaches down the road.

signs for a gutter replacement

12 Telltale Signs for a Gutter Replacement

Wondering if it’s time to upgrade? Here are the most common signs for a gutter replacement.

1. Cracks and Splits

Even small cracks in your gutters allow water to leak through and damage your fascia, siding, or foundation. Over time, these cracks will expand, especially in freezing temperatures.

2. Gaps Between Gutter Sections

Seamed gutters are especially prone to separation. If your gutters are coming apart at the seams or pulling away from your house, it’s time to consider a more durable, seamless system.

3. Rust or Corrosion

If you see rust spots or orange staining on or below your gutters, the metal is breaking down. Rust will eventually turn into holes, leaving your system useless.

4. Sagging or Bowing Gutters

Sagging gutters indicate that brackets or hangers have failed, or worse, that the system is holding too much weight from standing water. If re-securing them hasn’t helped, replacement is likely needed.

5. Peeling Paint or Stains on Siding

If paint is bubbling or wood siding is discolored near your gutters, it often means water is spilling over or leaking behind the gutters.

6. Pooling Water or Soil Erosion

Check your landscaping after a heavy rain. If there are muddy patches, water pooling near the foundation, or channels carved into the soil, your gutters aren’t doing their job.

7. Basement Flooding

One of the most expensive consequences of poor drainage is basement flooding. If water is making its way into your home, faulty gutters could be the cause.

8. Visible Mold or Mildew

Excess moisture from leaking gutters can lead to mildew on your home’s exterior or even mold growth in your attic or basement.

9. Overflow During Rainstorms

If water flows over the edges of your gutters rather than through the downspouts, your system may be poorly pitched, undersized, or clogged beyond repair.

10. Unexplained Screws or Fasteners on the Ground

Loose hardware near your home’s perimeter might be a sign that your gutter system is falling apart. If you keep finding nails or screws, it’s time to investigate.

11. Denting and Impact Damage

Severe dents or bent sections (often caused by ladders, tree limbs, or hail) can create flow issues. In seamless systems, replacement of the entire run may be the only solution.

12. Age of the System

If your gutters are more than 20 years old, especially if they’re made of vinyl or have seams, it may be time to replace them, even if there are no obvious problems yet.

When Is the Best Time to Replace Your Gutters?

The best time to replace your gutters depends on a few factors, but in general, spring and early fall are ideal. Here in Westminster, CO, spring replacement gives you a fresh start before heavy summer storms, and fall ensures your gutters are ready to handle snowmelt and ice.

That said, don’t wait for the “perfect season” if your home is already showing clear signs for a gutter replacement. A failing gutter system can lead to serious damage at any time of year. Prompt replacement is always better than waiting for a small problem to turn into a costly disaster.

Repair or Replace? How to Decide

If your gutters have isolated damage, like a single loose bracket or one leaky joint, repair may be a cost-effective option. But if you’re seeing multiple issues, especially structural ones or recurring leaks, it’s best to replace the system altogether.

You should also consider:

  • Material lifespan: Aluminum lasts 20+ years; vinyl less.
  • Type of gutter: Seamed systems fail faster; seamless gutters last longer.
  • Frequency of problems: Are you constantly repairing one issue after another?

When in doubt, have your gutters professionally inspected. In Westminster, CO, weather swings and snow loads can shorten the lifespan of lower-quality systems, making early replacement a wise investment.

Why Homeowners in Westminster, CO Choose Us

At Mile High Roofing Services, we know what it takes to build a gutter system that holds up to Colorado’s challenging climate. As a local company with over a decade of experience, we’ve helped thousands of homeowners protect their homes with seamless gutter installations and top-tier workmanship.

We don’t believe in shortcuts. From the materials we choose to the way we secure every bracket and slope every line, your new gutter system will be installed for maximum durability and performance.

Our team will help you identify when it’s time to replace gutters, explain your options clearly, and ensure the process is smooth from start to finish. Plus, we stand by our work with strong warranties and reliable customer support.

Schedule Your Free Estimate Today

If your gutters are cracked, sagging, or causing water damage, don’t wait until the next big storm to take action. We’ll inspect your current system and help you decide on the best time to replace your gutters based on your home’s needs and the local weather.

Schedule your free estimate today with Mile High Roofing Services: Westminster’s trusted experts in gutter replacement and protection.

If you’re tired of cleaning out soggy leaves, pine needles, and roof grit from your gutters, you’re not alone. Gutter maintenance is one of the most dreaded (and dangerous) chores for homeowners. Thankfully, there’s a smarter solution. This gutter guard guide will walk you through everything you need to know about choosing the right gutter protection system for your home.

From understanding how gutter guards work to comparing popular materials and designs, we’ve got you covered. By the end of this guide, you’ll know what kind of leaf guard system fits your needs and how to take the next step toward clog-free, low-maintenance gutters.

What Are Gutter Guards and How Do They Work?

Gutter guards, also called gutter covers, leaf guards, or gutter protection systems, are installed over your existing gutters to prevent debris from entering while still allowing rainwater to pass through. The purpose is simple: to limit the need for frequent cleaning while protecting your home from water damage caused by clogged gutters.

Here’s a breakdown of how gutter guards work:

  • Debris is blocked or diverted before it can enter your gutter system.
  • Rainwater flows through openings, holes, or mesh into the gutter channel.
  • Water is then carried away through the downspouts just as it would with unprotected gutters.

A well-installed leaf guard system prevents overflow, reduces the chance of ice dams, and protects your foundation from water runoff, all while minimizing your time on a ladder.

Technician installing gutter guards on a residential roof

Types of Gutter Guards: Pros and Cons

There are many gutter guard types available today, and each has unique benefits (and drawbacks) depending on your environment, roofline, and tree coverage. Let’s explore the most common options.

Bottle Brush Guards

These guards look like long pipe cleaners that sit inside your gutters. Water flows through the bristles, but leaves and twigs are supposed to stay on top.

Pros:

  • Inexpensive and easy to install
  • No impact on your roof

Cons:

  • Quickly clog with small debris
  • Difficult to clean
  • Not long-lasting

Foam Gutter Guards

Foam inserts fit directly into your gutters and block large debris while allowing water to seep through the foam.

Pros:

  • Budget-friendly
  • Simple DIY installation

Cons:

  • Trap moisture and plant matter
  • Can break down or grow mold
  • Require frequent replacement

Vinyl and Plastic Snap-On Guards

These guards clip onto your gutter system and act like a cover with holes or slots to allow water in.

Pros:

  • DIY-friendly
  • Better than foam or brush for blocking debris

Cons:

  • Prone to warping and cracking in extreme temperatures
  • Can interfere with roof or siding work
  • Shorter lifespan

Perforated Aluminum Guards

Perforated guards are installed directly over the gutter and made of rust-resistant aluminum. They let rainwater in through small holes while keeping most leaves and debris out.

Pros:

  • Durable and rust-proof
  • Can last decades with minimal maintenance
  • Blends in well with gutter systems

Cons:

  • Some small debris may still enter
  • Typically requires professional installation

Reverse-Curve Gutter Guards

These systems cover the top of the gutter and use curved metal to guide water into a small opening while debris slides off the edge.

Pros:

  • Excellent for shedding large debris
  • Long-lasting if installed correctly

Cons:

  • May struggle with fast-flowing water
  • Can be visible from the ground
  • Risk of roof damage with improper installation

Micro-Mesh Gutter Guards

The gold standard in best gutter protection, these fine stainless steel or aluminum mesh guards filter out even the smallest particles, including pine needles and roof grit.

Pros:

  • Filters all debris types
  • Invisible from the ground
  • Excellent performance in wooded areas

Cons:

  • Higher upfront cost
  • Must be installed professionally
  • Still requires occasional blow-off cleaning

What Is the Best Gutter Protection System?

When it comes to choosing the best gutter protection, it really depends on your home’s specific needs. If you have minimal tree coverage and want a quick DIY solution, plastic or foam guards may do the trick temporarily. But for long-term performance, micro-mesh and perforated metal systems are hard to beat.

Key Factors to Consider When Choosing a Gutter Guard

If you’re comparing options, here are some important things to keep in mind as you follow this gutter guard guide.

Material

Stainless steel and aluminum offer superior durability and weather resistance. Vinyl and plastic are cheaper but won’t last as long, especially in harsh climates.

Debris Type

Do you have pine needles, heavy leaves, or roof shingle grit? Choose a guard that’s fine enough to filter your most common debris type.

Roof Slope and Water Flow

Steep roofs and heavy rain need guards that handle fast-moving water. Micro-mesh and reverse-curve options are ideal for these conditions.

Installation

Some guards are DIY-friendly, but premium systems should always be installed by a pro to avoid voiding your roof warranty or damaging fascia boards.

Visibility

If aesthetics matter, micro-mesh and in-gutter systems are often invisible from the ground.

Why Gutter Guards Matter for Homeowners

Gutter guards aren’t just about saving time; they help prevent real damage to your home. Clogged gutters can lead to:

  • Roof leaks and rot
  • Foundation damage
  • Landscape erosion
  • Mold and mildew around the fascia
  • Ice dams in winter

A quality leaf guard system prevents these issues while extending the life of your gutters and roof. When installed correctly, gutter guards pay for themselves in maintenance savings and long-term home protection.

Schedule Your Free Estimate Today

Now that you’ve read this gutter guard guide, it’s time to take the next step. Whether you’re looking for low-maintenance gutters or the best gutter protection for a tree-heavy yard, Mile High Roofing Services is here to help.

Our team will walk you through all the gutter guard types, inspect your current system, and recommend the right solution based on your home, your trees, and your budget.

Schedule your free estimate today and let us help you install the perfect leaf guard system for your home.